Showing posts with label crafts. Show all posts

Sunday, February 11, 2018

Painted Rocks

A couple months ago, we did one of the Michael's Saturday morning kids crafts workshop. We do these from time to time when I'm looking for something to do and I remember to look up the craft ahead of time (think, busy mom that forgets a lot). The reason I always want to look ahead of time is to make sure it's something my son will actually enjoy. Our Michael's is on the opposite side of town and frankly, we just don't go over there if we don't have to. Plus, Michael's crafts aren't free. So, I saw that they were doing painted rocks and thought my son would really enjoy this! And it's SO easy to do at home. If you haven't seen these, you've been living under a rock! See what I did there...
Yeah...so...painted rocks are cool now. So we got there, walked in, they gave us our supplies (flat rocks, paintbrushes, paint, plate to put paint on, and paper towels so we didn't make a mess), and I brainstormed with my son about what we should make. That's right. We. Some parents just let their kids go at it and make whatever and that's awesome! Let your child stretch their creative wings! More power to you! But that is just not who I am. I like to make sure that he's not just making crap. He can do that at school. So we planned out what the rocks were going to look like in the end. And we talked about what he wanted to do and what he wanted me to do.

And we chose the rocks with our ideas in mind! We chose a somewhat square one for our Creeper head from Minecraft, an oval one for our owl, and then we knew we had to make a heart when we found a rock that was heart-shaped.

We did the background color for each of the rocks first. That way, when we were done, the first one was dry enough to add detail. Since our rocks were black, we had to do multiple coats for lighter colors.Make sure the paint is completely dry before adding a new layer on top to avoid your colors bleeding together.

After we finished, we let our rocks sit while we did some shopping and then came back to pick them up when they were dry. I think they turned out great and we'll definitely be making some more this summer!

Even though we had a great time painting our rocks, I am by no means endorsing Michael's Kids Club. My favorite is Home Depot's Kids Workshops, but those are only held once a month. Michael's is just a back-up if we're already planning to be out and they have something interesting on the docket. Some of their crafts are sponsored by Sprout which my kid hasn't watched in like 4 years so we're not interested at all. And while most of the crafts aren't OVERLY girly, some of them are! I mean, my son is cool with making bracelets, but he's not okay if I take him to make a fairy house. Our biggest complaint has been the people in charge of these crafts. The woman that used to be in charge of these used to complain about kids. I don't know why she felt comfortable talking about this with me, but it was really annoying and unprofessional. And the girl in charge now is just so quiet. We have to ask like 100 questions just to get the details about the craft we're making. So go into these with your eyes wide open people!

Saturday, February 3, 2018

Craft Fair

In December, I had a booth at my second ever craft fair. I think the hardest part so far is getting enough inventory. The second hardest part is putting together an attractive display.

First, let's talk about inventory. My 2 best sellers were ornaments and stuffed animals. Next time, I definitely plan to make more of those 2 things. I didn't sell as many hats as I thought I would. So it just goes to show you that things you like and what you think is going to sell really well, may not be what everyone else is willing to buy. My profits have not been as high as I would like them to be. But my second craft fair went better than my first. So I'm willing to keep trying and hopefully, it will just keep getting better.

Now, for the display. My first fair was just embarrasing. I cringe just thinking about it. I had 2 tables with no covering. I used plastic crates for my display. For my second fair, I thought a little more about the display. I made a spinning tree for my key fobs. I used a wooden crate this time. And my husband made me some wooden stairs to display my stuffed animals. I did think to bring a black table covering for my main table. But then I decided to use a second table and last minute, threw an old blanket on it so they didn't match at all. Next time, Im going to try to make it look a little more cohesive. Ah! We all have goals, right?

I think the biggest take-away is to keep learning and keep evolving through each one. And if you want to buy something from my crochet business, feel free to head on over to klcrochet.etsy.com where I sell finished items AND patterns!

Sunday, December 24, 2017

Our New Year's Eve Schedule!

Last year, on New Year's Eve, we did something really cool. We spent the day at the in-laws' homestead. Now, they only have TVs in the bedroom and they don't really ever plan anything to do so if you come unprepared, you could end up pretty bored. However, knowing this in advance, I prepared. We started at 8am and ended at 8pm so that our 6-year-old could still go to bed at his normal time. He didn't seem to mind. We started with a schedule:

8am: Ring Pop 'Get ready for 12 Hours of Ringing in the New Year!'
9am: Make a '2017' sign
10am: Glitter some champagne glasses
11am: Decorate star cookies
12pm: Gift
1pm: Play a game
2pm: Make a new years ball
3pm: Make headbands/hats
4pm: Write new year's resolutions
5pm: Make noise makers
6pm: Photo booth
7pm: Fun with sparklers
8pm: Ring in the New Year with sparkling cider

Then we executed:
8am: Ring Pop


9am: Make a '2017' sign


10am: Glitter some champagne glasses


11am: Decorate star cookies (I made the cookies the night before)


12pm: Gift (I just picked up a couple things from Party City totalling about $5. It was a nice break between activities)


1pm: Play a game


2pm: Make a New Years ball (We just made this with a piece of paper that we added glitter to and a couple brads)


3pm: Make headbands/hats (Again, we just made these out of paper and glitter)


4pm: Write New Years Resolutions


5pm: Make funny noise makers (This was so much fun. We took a paper plate and drew a mouth/beak/mustache. Then, we colored it and cut it out. We cut an X where we wanted the noise maker to go and then just inserted the mouth piece into the X.)


6pm: Photo booth (we used the noise makers and hats along with the props I brought)


7pm: Fun with sparklers


8pm: Ring in the New Year with sparkling cider


Now, just to be clear, we didn't follow our schedule completely. We ended up eating breakfast and opening Christmas presents (we weren't able to see them for Christmas so we just celebrated a week late) in the morning so we got a couple hours behind. Also, since glitter is very messy, we ended up prepping all the glitter things at one time (during the glitter champagne glasses time) and then assembling our ball and hats during the time slot to make them. This worked out well since they needed time to dry anyway. By the end of the night, my son was watching the clock so that he could tell me the exact minute it turned to the next hour so that we could open up our next activity! It was great. And no one got bored!

Saturday, September 9, 2017

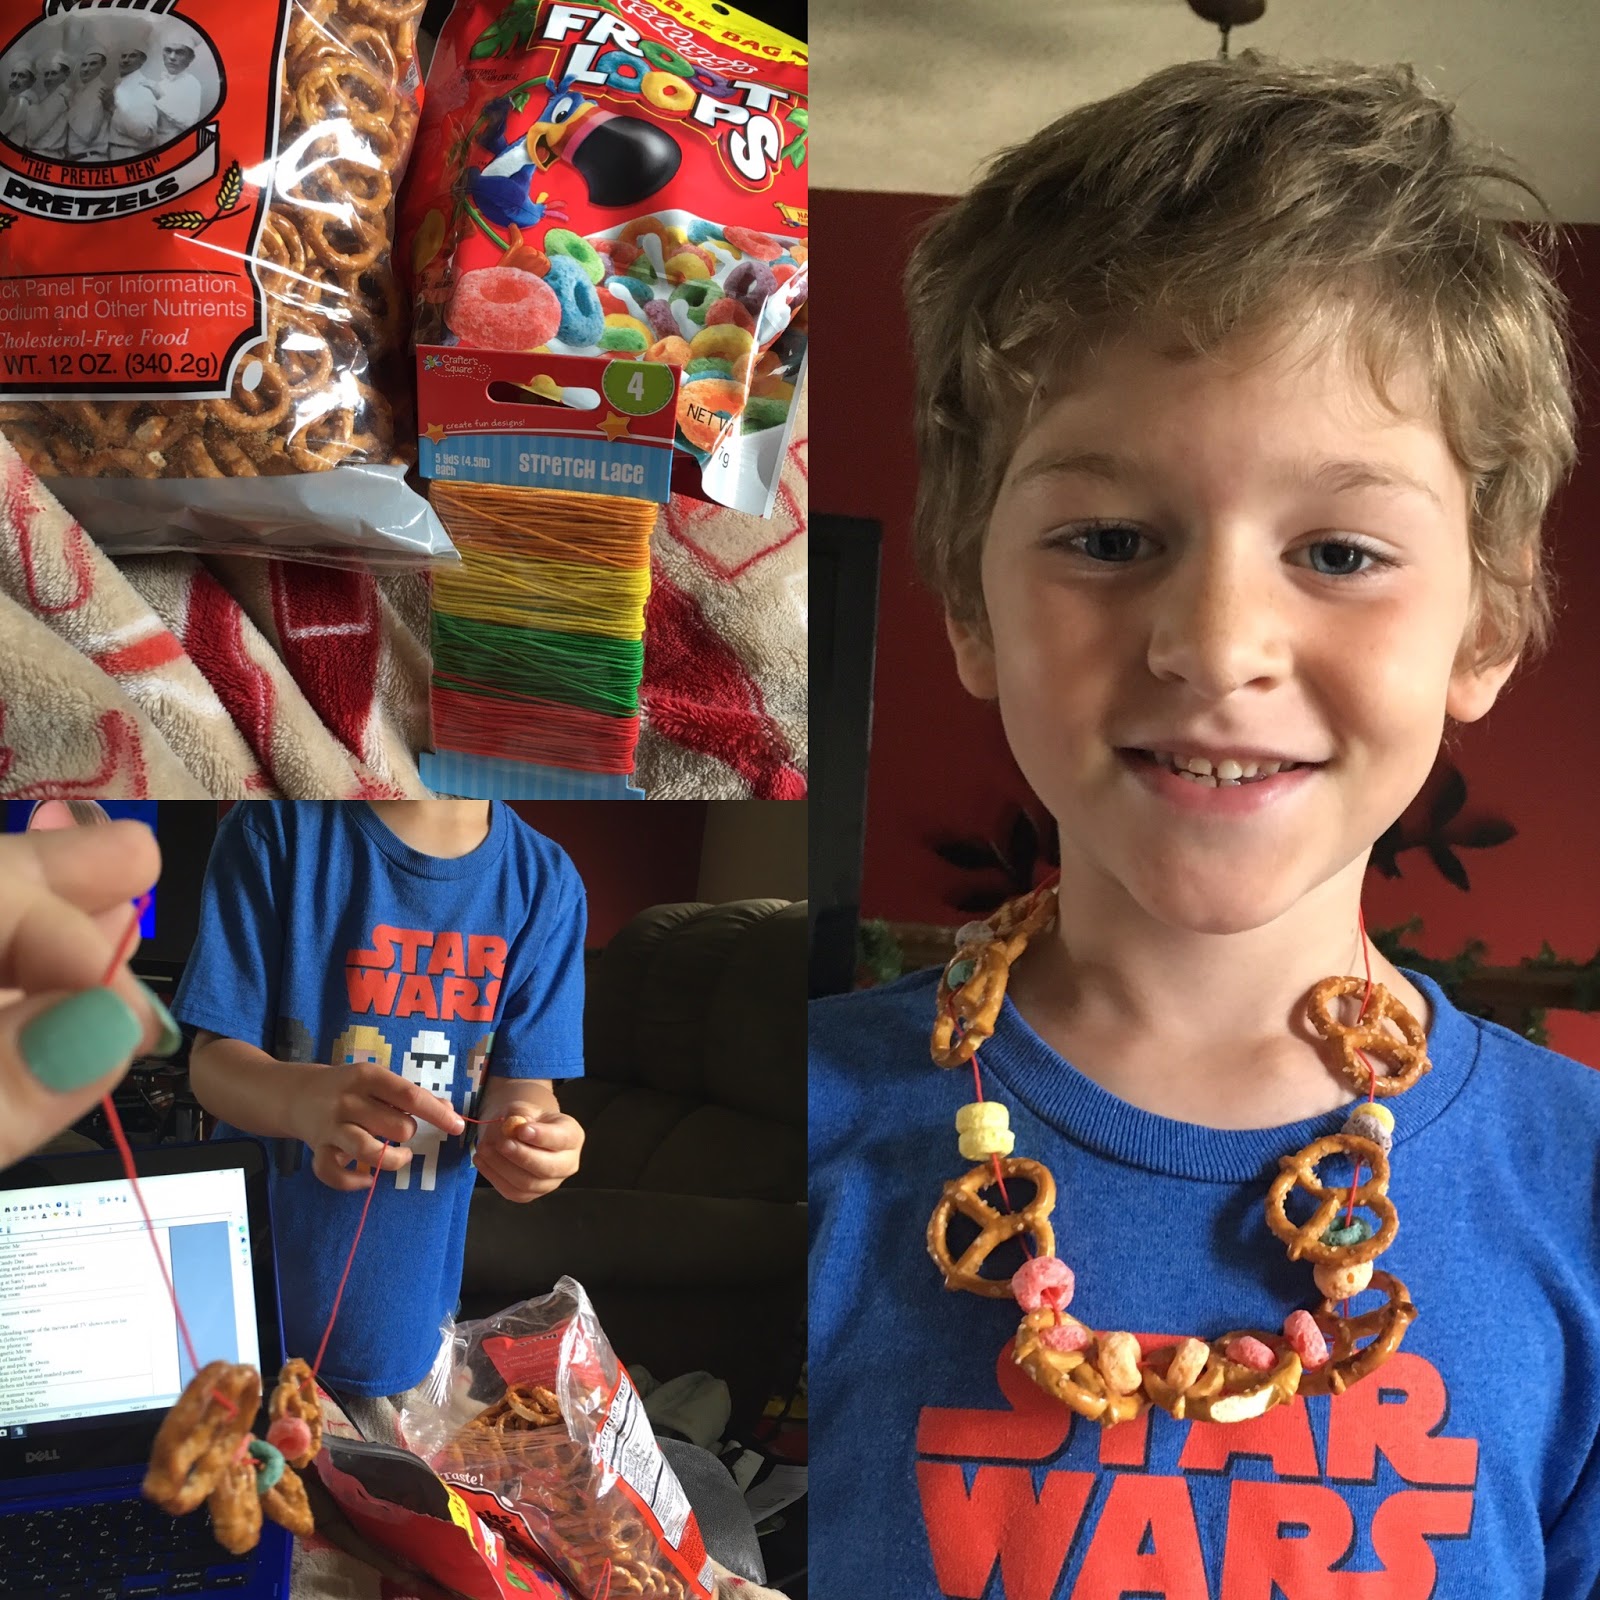
Snack Necklaces

This is a fun little craft to do with your kids before a vacation (or anytime, really). We made 8 of them before we went on our huge long road trip. They turned out great! I wanted to make these as cheap as possible so we went to Dollar Tree where we found some stretchy string, a bag of fruit loops, and some pretzels! You could easily use any other snack item that has a hole in it like cheerios, gummy lifesavers, chocolate covered pretzels, mini cookies, chocolate cheerios, etc. or you could use a needle and thread and go through squishy foods like grapes, blueberries, dried pineapple, gummy bears, popcorn, etc. as well as your holed snacks. Any combination of these things would be delicious. Part of the reason I chose what I did was because I could find them at Dollar Tree, which is cheap, yes, but also because I didn't want to worry about melting chocolate or candy. Plus, we were using string and not a needle and thread. So anyway, here's how we did it:

First, gather all of your ingredients.
Then, cut a length of string that at minimum fits around your head.
Slide your snacks on the string.
And tie the ends together.

See? Easy! And fun for kids to make and then later, eat!

Sunday, June 11, 2017

Craft: Windchimes

Today, we made a very fun and cute little windchime. It cost a mere cents to make so that's also a plus!

We started out by picking up a stick in the yard, taking it to the garage, and sawing it down to size. We really liked how it was curved.

Then we collected some materials (black yarn, beads, and a couple washers).

We started out by attaching string to the stick. This will be the string that it hangs from.


I asked Owen how many strings he wanted to attach to the stick and his response was 7 (as expected, since he's 7). So we cut 7 lengths of string.

We then attached beads and washers to said pieces of string. He wanted to make them in a rainbow pattern.


And voila! We now have our windchime! We hung ours by the front door.

Sunday, May 28, 2017

Summer Bucket List

We have so much stuff planned for this summer! Last summer I was working full-time and while I enjoyed having the extra money, it felt like I didn't get to spend very much time with my son. So since I'm going to be home full-time this summer, I decided to make it a summer he'll never forget! Together, we came up with a list of things we want to do! I made a PDF that we've printed up so that we can check each thing off as we do them. I thought I would share our list with you to help give you some ideas for your summer plans. Hopefully, we can inspire you to get out there and try new things. We definitely don't want to be couch potatoes this summer! Let me know if you have any extra ideas we can add to our list for next summer!


Click here for a downloadable PDF version of our list!